Rectitude : Procgen + Pixel Art (Beta)
Stone Wall Tutorial Part 2 : building your own lib of nodes.
At the end of the first tutorial we used a node - stone.pc - from the standard library. And it was a bit magical. The node was behaving like any other nodes but it was very specific for the case at hand.
It was a good fit because it was built for this purpose. With Rectitude itself.
With Rectitude, you can build graphs that can be used like a built-in nodes. They can be imported to the node catalog and used like any other node.
This post is all about opening the curtain and explain the magic at hand. How you can create this kind of graph.
Before we go further, we need to explain the key difference between built-in nodes and stdlib nodes. The built-in nodes are hard-coded into the software, they correspond to lines of source code. I had to type them either in Python or C++.
But the stdlib nodes lie stone.pc were build with Rectitude itself. They are saved in the stdlibfolder of your project. They are normal graphs with only few additions.
You can actually go into the lib folder in your project and open any of them and see it.
If you open Stone.pc in the stdlib folder of your project you'll see that:
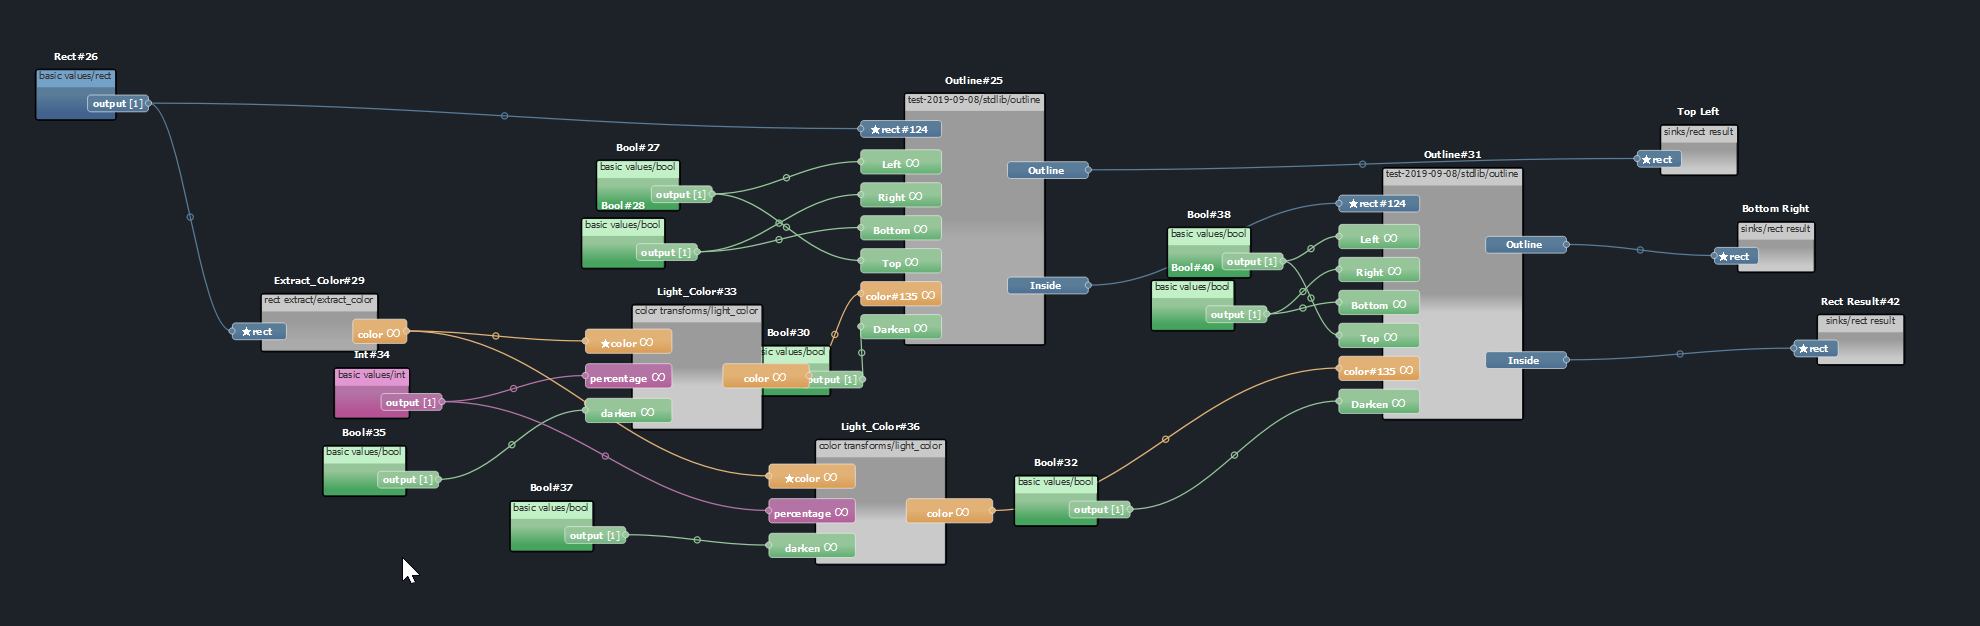
As you can see it is no fundamentally different that the one you've just built.
So the $100 question is : how to make a graph that can be imported ?
For a graph to be used as a node, it needs to document what are the input slots and the output slots of the node it will be turned into.
Roughly speaking something like that :
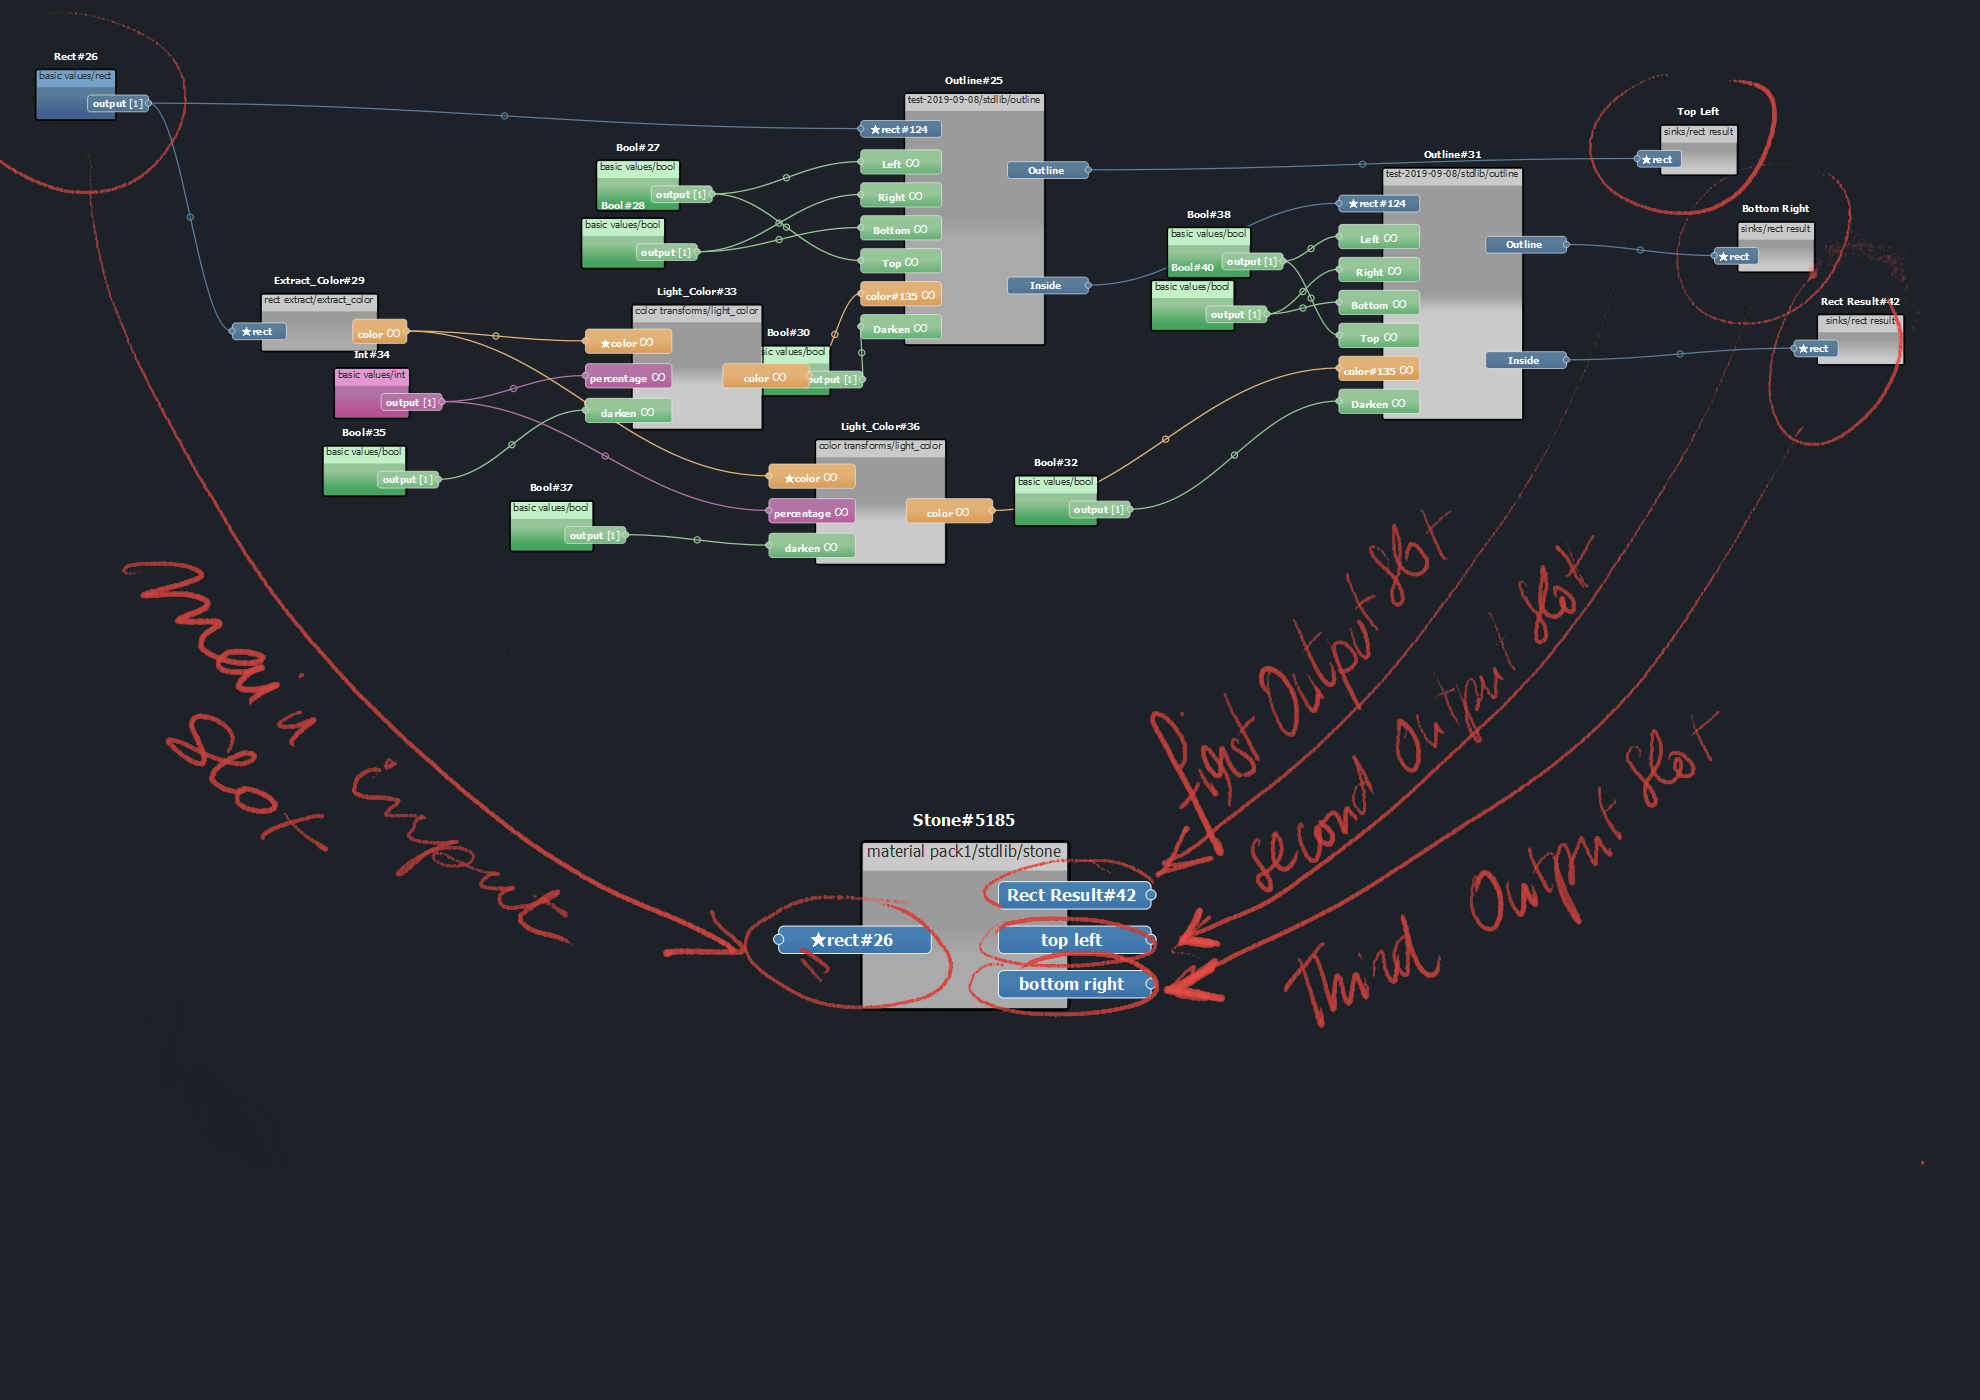
Said differently, it means :
- that all the slots must have a name, a type and a specific order.
- one of the input slot is the main slot.
So the user needs to build a kind of mapping between the value node in the graph and the input slots in the node it will be turned into. And something similar for the output nodes.
To document these informations, Rectitude provides the export mechanisms.
For the inputs
The information is in the properties. All value nodes have an Export checkbox, once checked the checkbox reveal the options for documenting how this value is to be converted into an input slot.

The first one tells whether this node will be turned into the main slot.
The second is optional and offer the possibility to override the name that the corresponding slot will take.
The third is the position in which the slot must be in the node. The slot order need to be coherent among all exported value nodes : starts at zero, no holes, increasing numbers for each slot.
For the outputs
For the output the principle is the same but the implementation is a bit simpler.
To mark the output of a graph we use Sinks. Those a special nodes that will be interpreted as output slots when the graph is converted into a node.
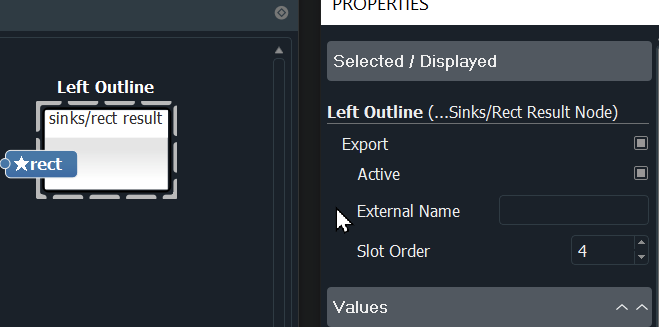
Like for the output, the slot order needs to be coherent.
Like for the input, one may optionally override the name of the Sink with a special name for export.
That's it. With this information, you should be able to design your own library for you project.
Have fun !
Leave a comment
Log in with itch.io to leave a comment.