Rectitude : Procgen + Pixel Art (Beta)
Tutorial 1 : Stone Wall.
Introduction
In this tutorial, we’ll build a simple brick wall and export it as an image. The colors, the size of the bricks and the size of the wall itself will be the parameters of this generator.
This tutorial will familiarize you with the most common operations. It is also a preparation for the next one that focuses on building your own node library.
Reading https://lbarret.itch.io/rectitude/devlog/38008/rectitude-principles is a prerequisite ( Don't worry it's really not long ).
Before diving in, a quick reminder about the gui of Rectitude. The different areas should be pretty obvious :
- the top has the menu and the icon for saving and loading,
- the top left is the preview,
- the bottom left is the node catalog,
- the bottom is the graph,
- and the right panel list the properties of the currently selected node and those of the value nodes in the graph.
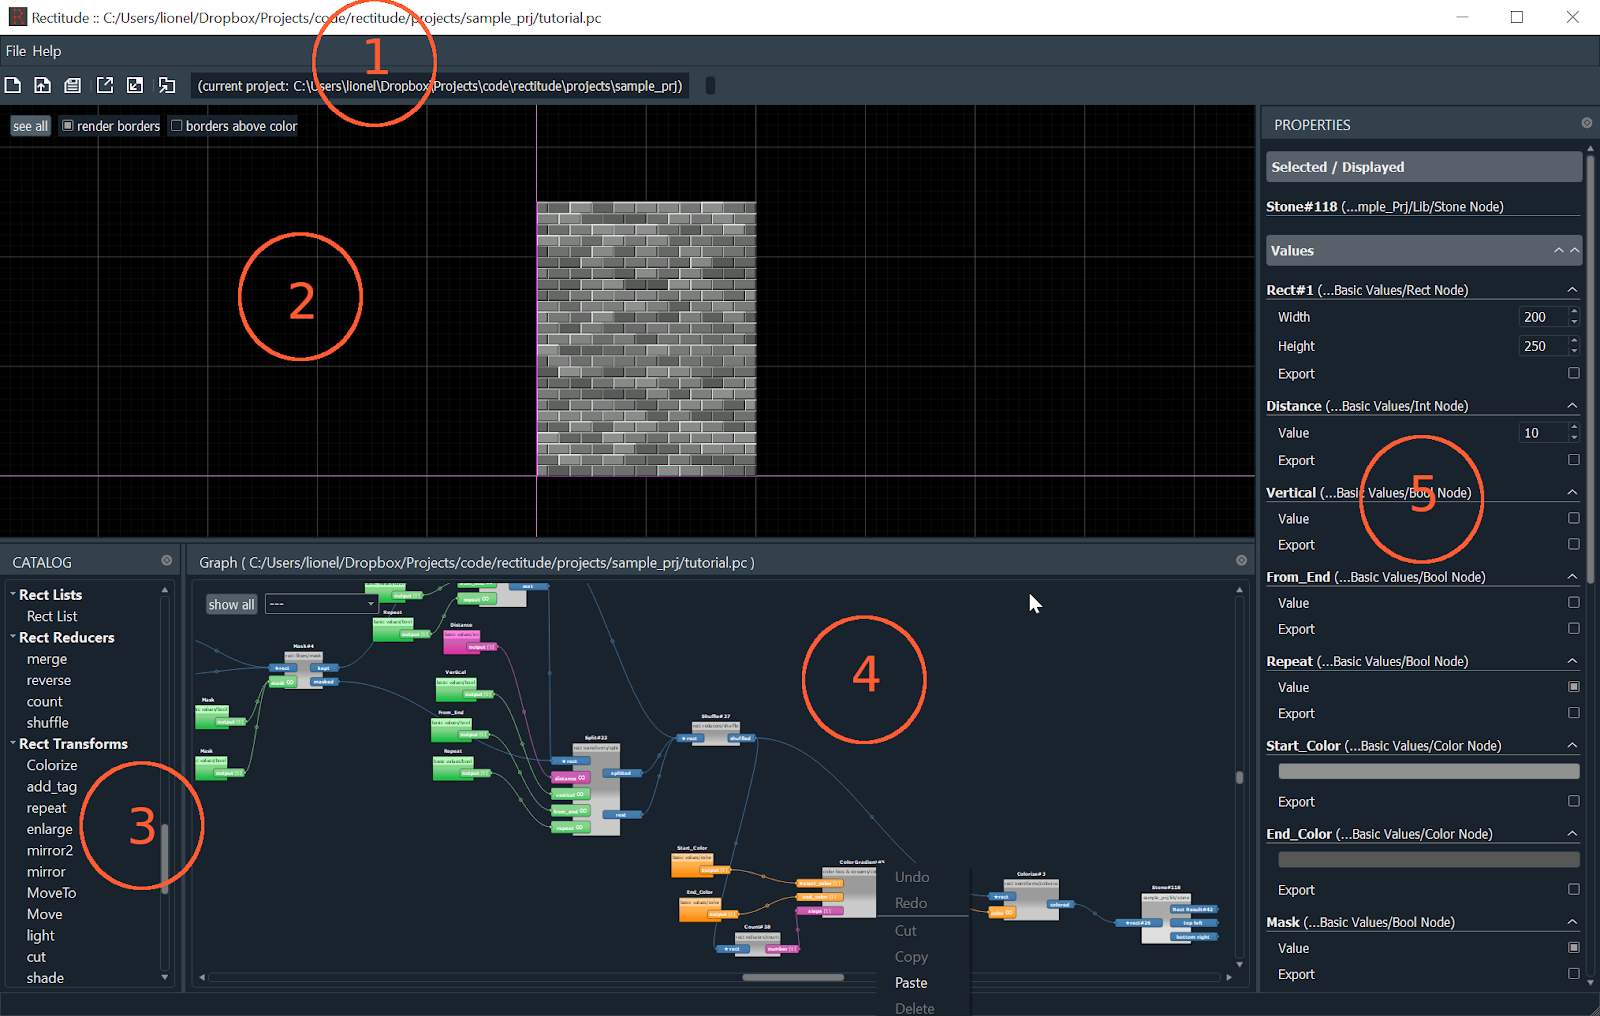
It is important to remember that the preview shows the result of the node is selected. If the node selected does not have a visual result nothing is shown.
Part 1 : Basic Skills
So let’s start...
The first step is to draw a single colored rectangle. To do so, drag and drop a rect node, a color node and a colorize node into the graph panel. Then connect them according to the color of the slots. Finally click on the colorize node.
Your graph should look like this :
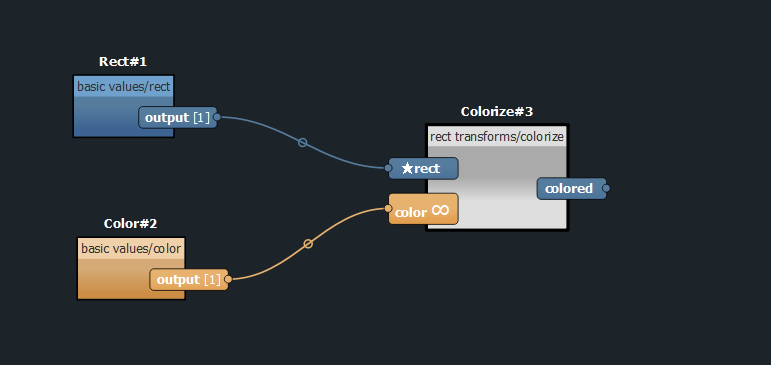
You should also see a grey rectangle in the preview pane. If it isn’t the case, click on the “see all” in the preview pane.
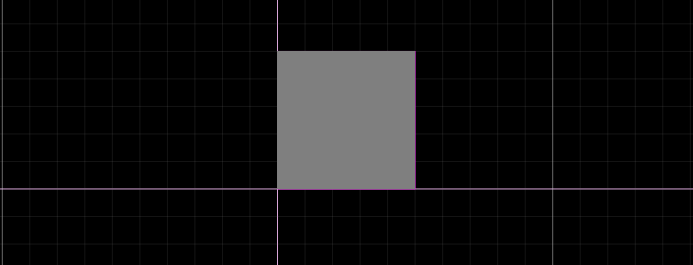
On the right, on the property panel, you can see the current node that is selected in the top half, and all the values in the graph (currently only the rectangle and the color node) on the bottom half. You can change the size of the rectangle or the output color of the color node and the preview will update automatically.
The next step is to split this colored rectangle and to color it with a gradient. You’ll need a split node and color gradient node. Once drag/dropped from the catalog, your graph should look like this :
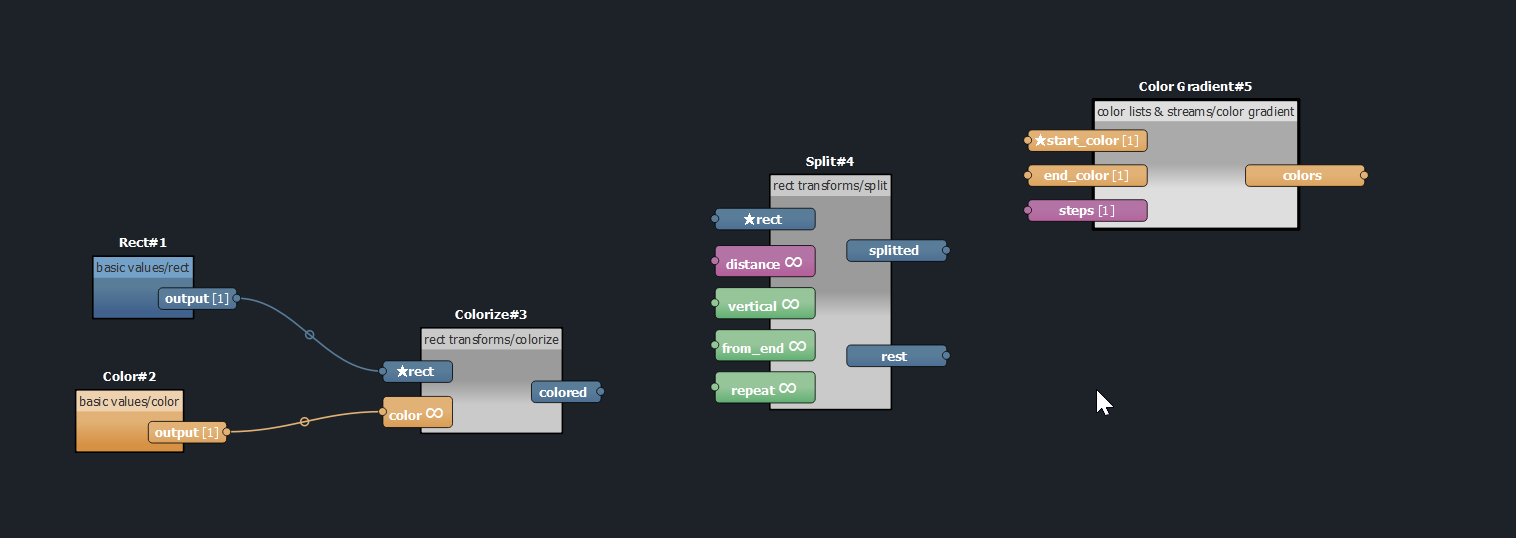
Our goal here is to first split the rectangle, then color the resulting slice from the gradient colors, with a bit of random for good measure. So the incomplete graph will look to something like that :
If you reproduce this graph and click on split, nothing is displayed in the preview pane. It’s because many slots of this node are not filled. In many graph editor, nodes have default value, not in rectitude, so a node with some empty slots does nothing.
( As you may have guessed already, the slots are color coded : red means integer, green means booleans, yellow is for color and blue for rectangle. )
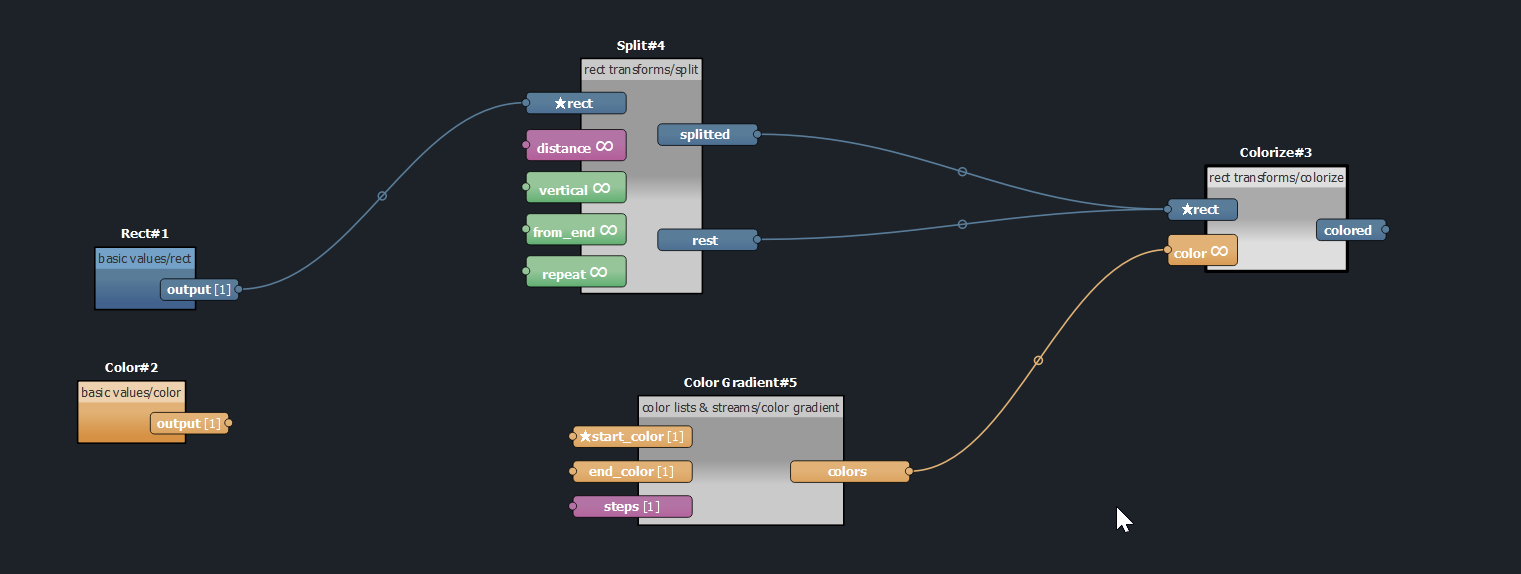
We could drag and drop the needed values, for each slot but it is faster to just ctrl+click on each input slot to have the right value node created. You should be able to quickly fill the missing pieces, like below :

The default value are mostly ok, the only things you have to do are to change :
- the inner value of the Repeat value node to True.
- the inner value of the Steps node to 5. ( it is on the bottom on the image )
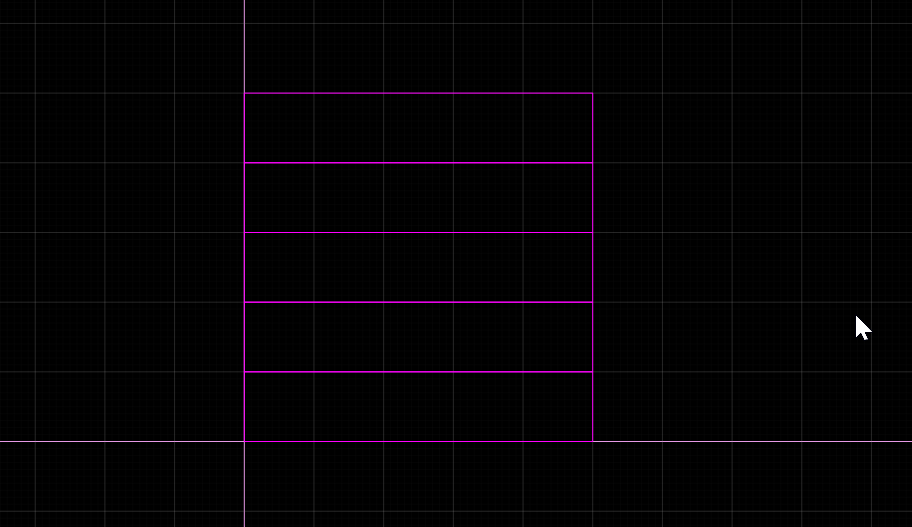
If you click on the Split node, you should see something similar to this in the preview :
The Split node we used here is part of a family, while they all do the same thing (slicing rectangles along an axis in more rectangles) there are a few subtle differences between them.
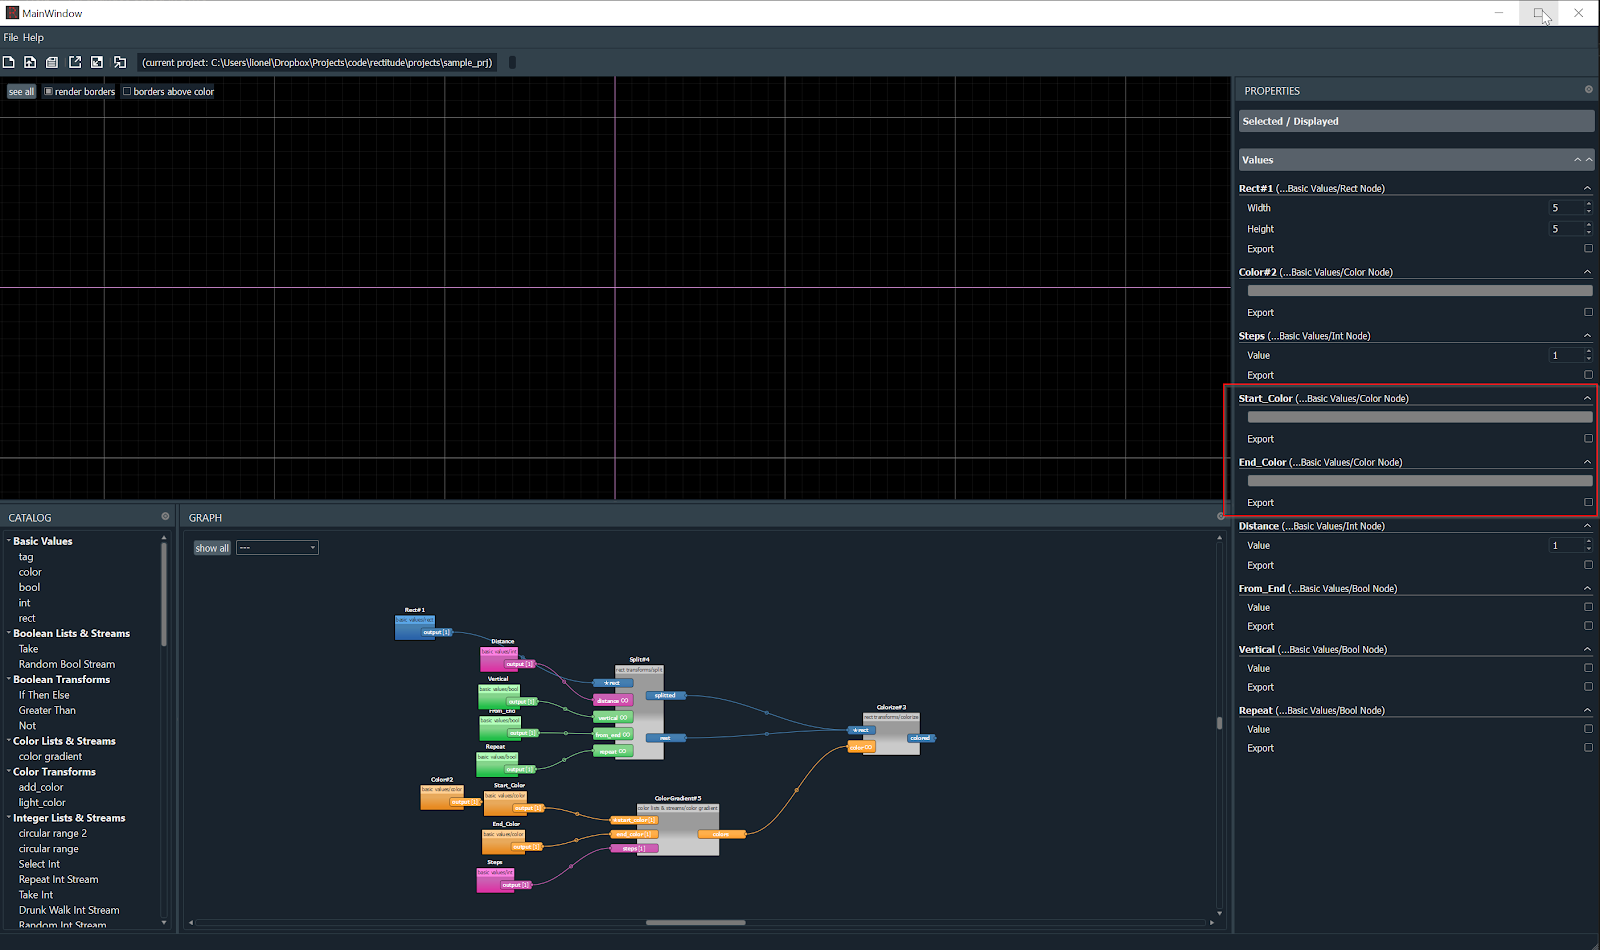
Now you need to change the start and end colors of the color gradient on the bottom. There are 3 ways of changing values - in our case the colors - in rectitude :
- Changing the colors in Values part of the property panel. Changing a value there doesn’t change the selection.
- Clicking on each color node in the graph and as a consequence changing the selection, then editing the color in the selected part of the property panel.
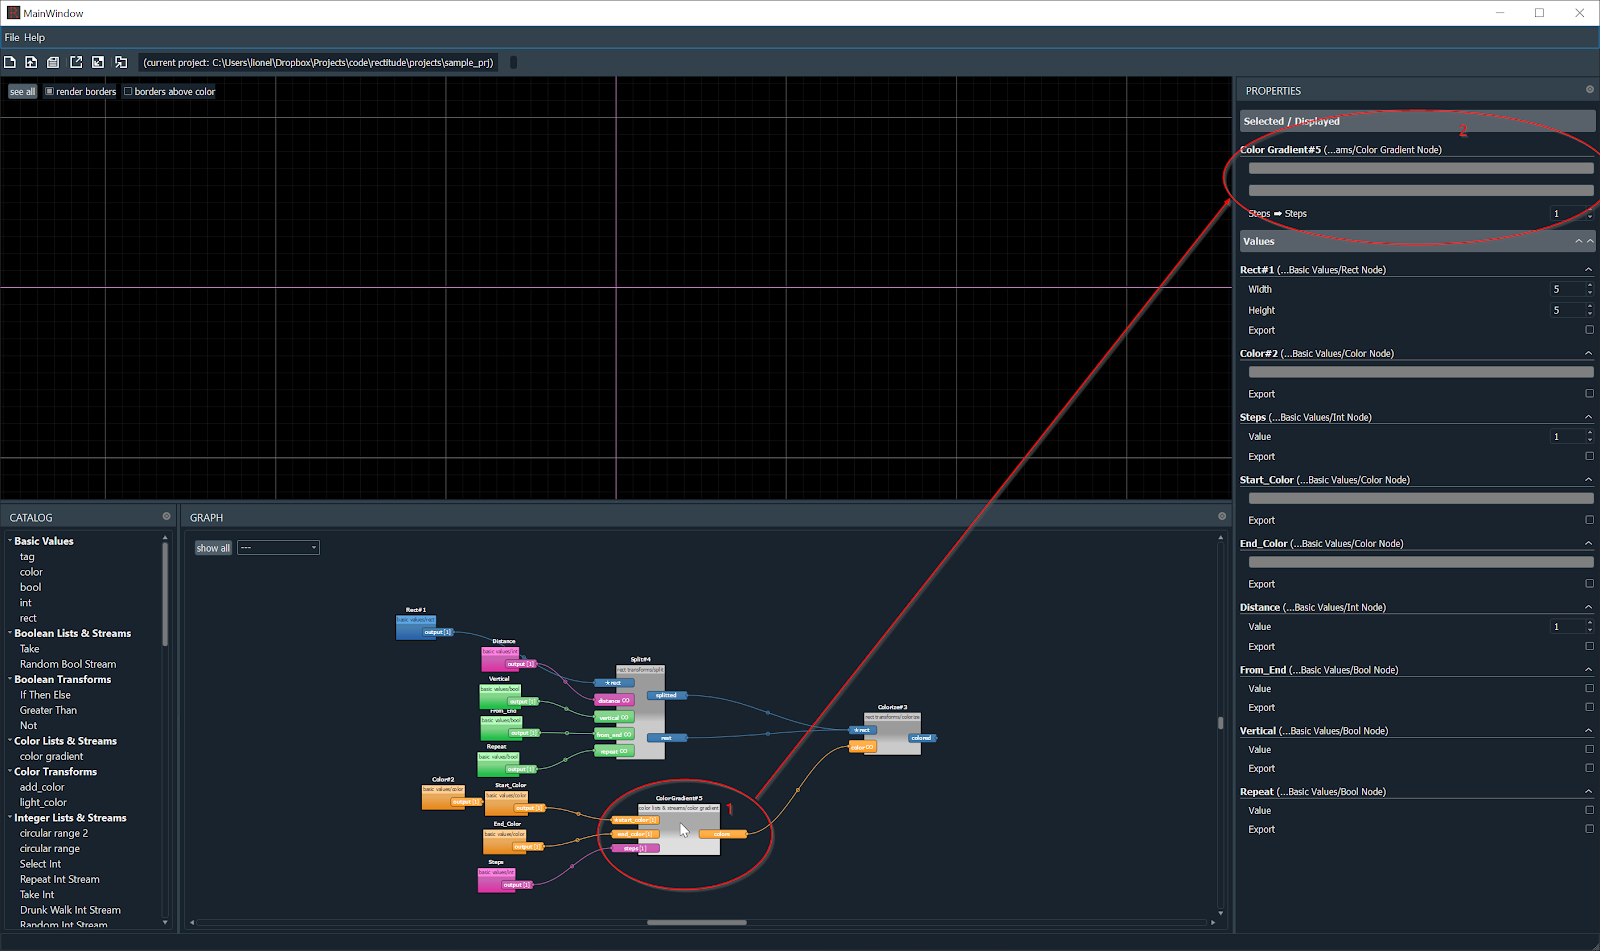
- Clicking on the color gradient transform, that will conveniently display all the inner value of value nodes directly connected to its slots.
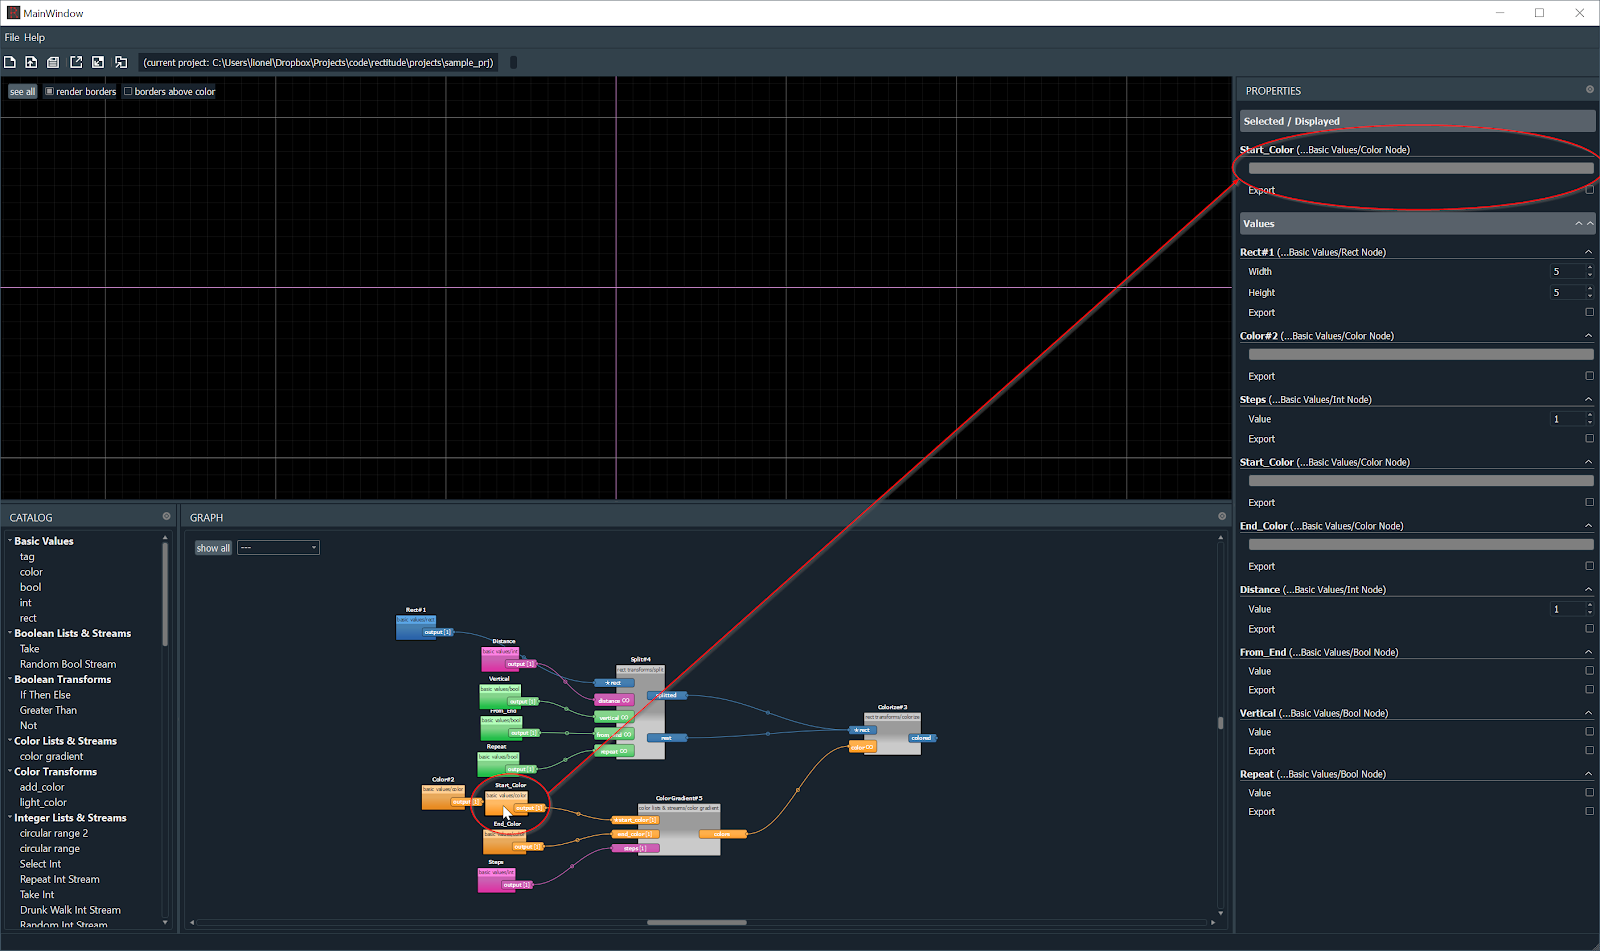
Just clicking on the grey rectangle will open the color picker :

Whatever the means you choose, if you click on the Colorize node, you should have something like that :
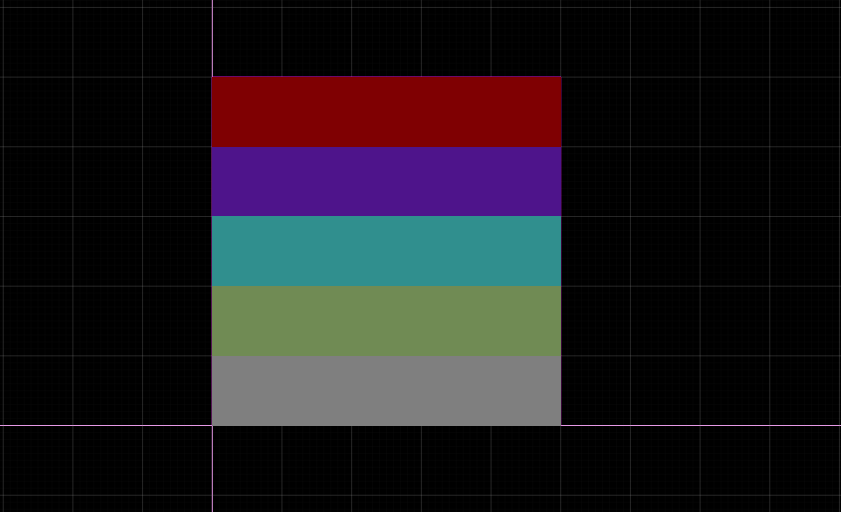
( Hopefully, you have chosen better colors than me. )
At this point, you should have learn the following skills :
- Drag and drop nodes
- Connect nodes
- See preview
- Ctrl+Click to create value node.
- Edit value from property panel ( selected and values )
Part 2 : adding randomness.
In this part, we’ll learn to leverage the standard library of nodes and to add randomness to our wall.
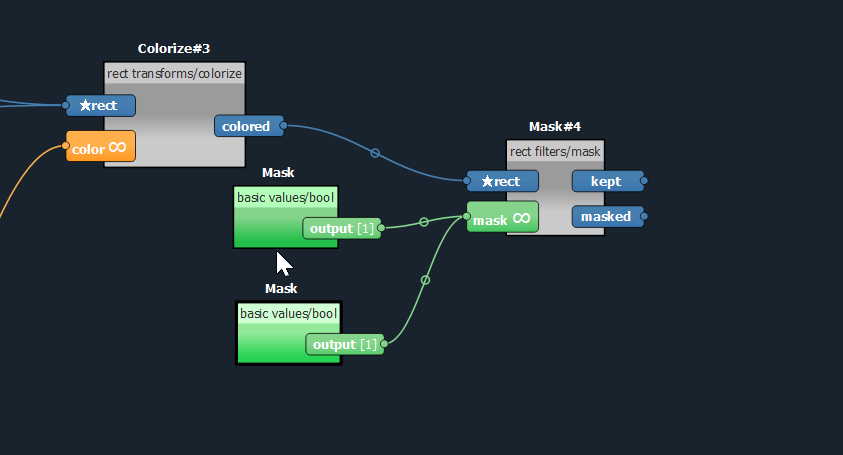
The first thing is to add a mask node. We will connect it to the output of the colorize :

Those are really useful they filter a stream of rectangle based on a stream of booleans. If the boolean streams is the sequence "False, False, True", the mask node will put only one rectangle every 3 rectangles into the kept output slots, the other being in the masked slot.
In our case, we want to select one rectangle over two to reproduce the offset between the brick rows. To create this simple boolean stream, we will simply connect 2 bool nodes to the mask input slots, the inner value of the first one will be true, the second one will be false. When connecting more than one node to the same slot, their values are appended. ( You can check their indices in the resulting list by hovering over the central circle on the connection. )
It should look like this :
If you click on the mask transform node, you should have the following in the property panel:

Still, the display in the preview panel, shouldn’t change. To quickly check whether, the slot has done its job properly, you can Ctrl+click on the masked output slot. It will deactivate it and add a small cross to its name. The display should then be something like :
Don’t forget to ctrl+click again to put reactivate it !
Now we will use another split node to get the offset on the filtered rectangle, something like :

If you click on the display, nothing should have changed, but clicking on the option “border above color” make things clear : for each rectangle a bit is cut on one side :
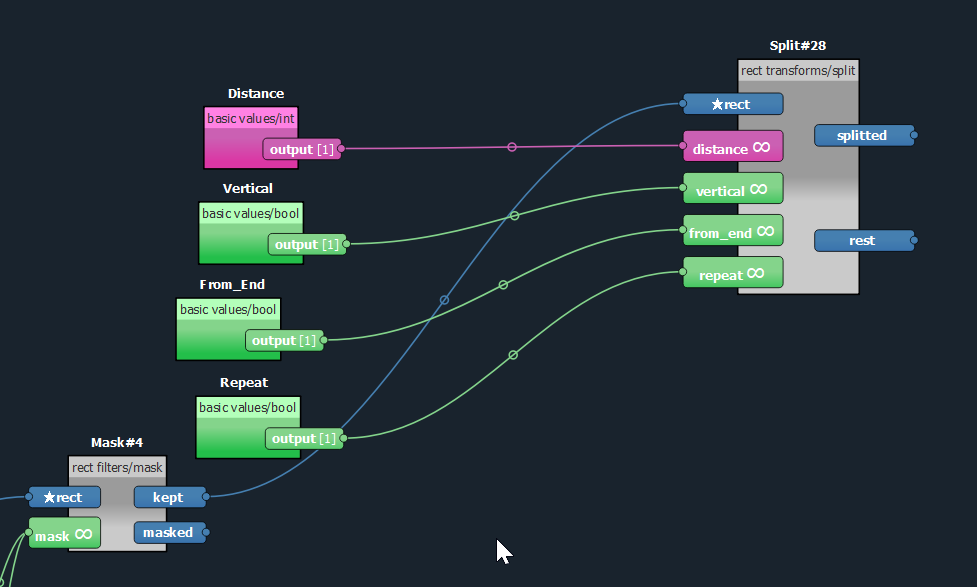
We will now add another split node that will take the offsetted rows and the normal one, and it will split the rectangles vertically at each brick length. The connections will be as follow :
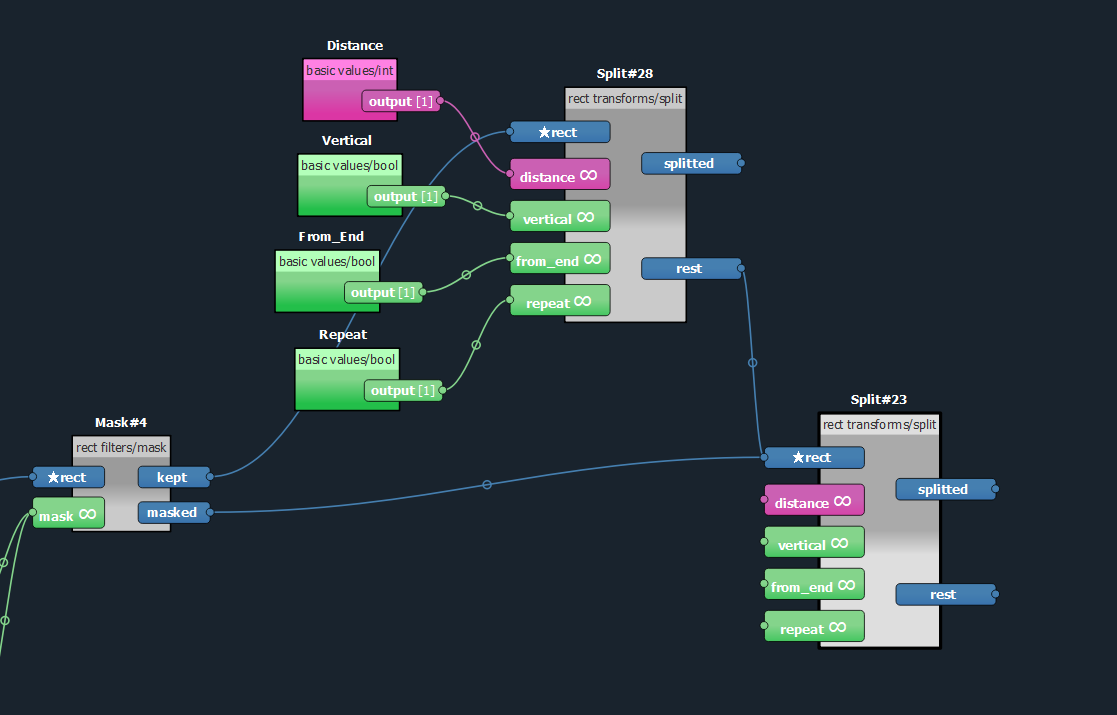
And we will complete the split#23 node with the following values ( ctrl+click on input slot is your friend ) :
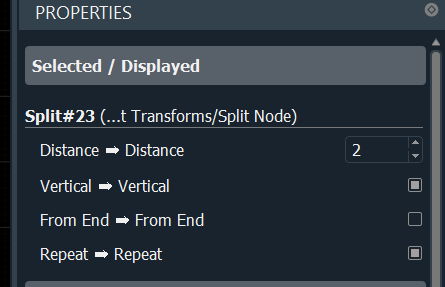
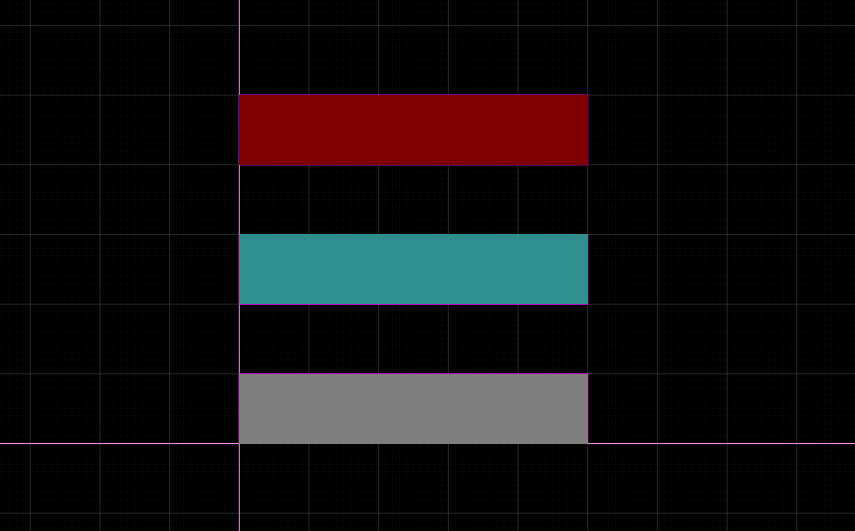
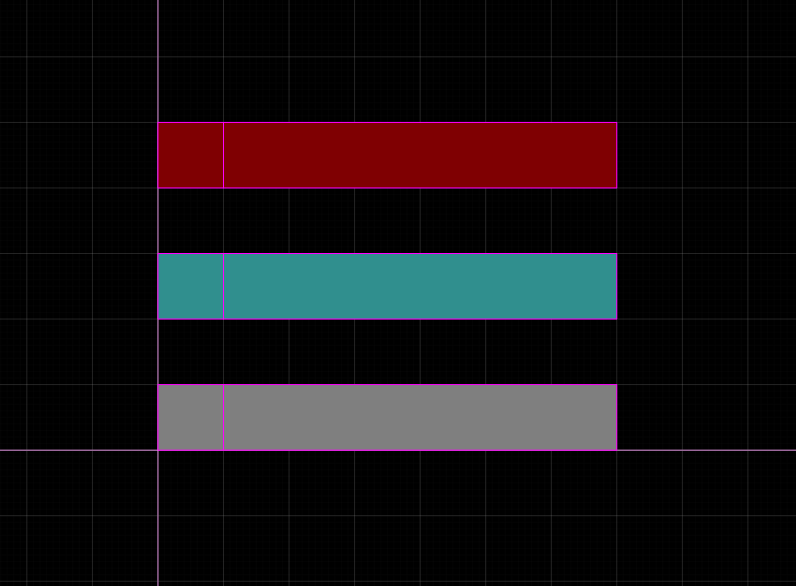
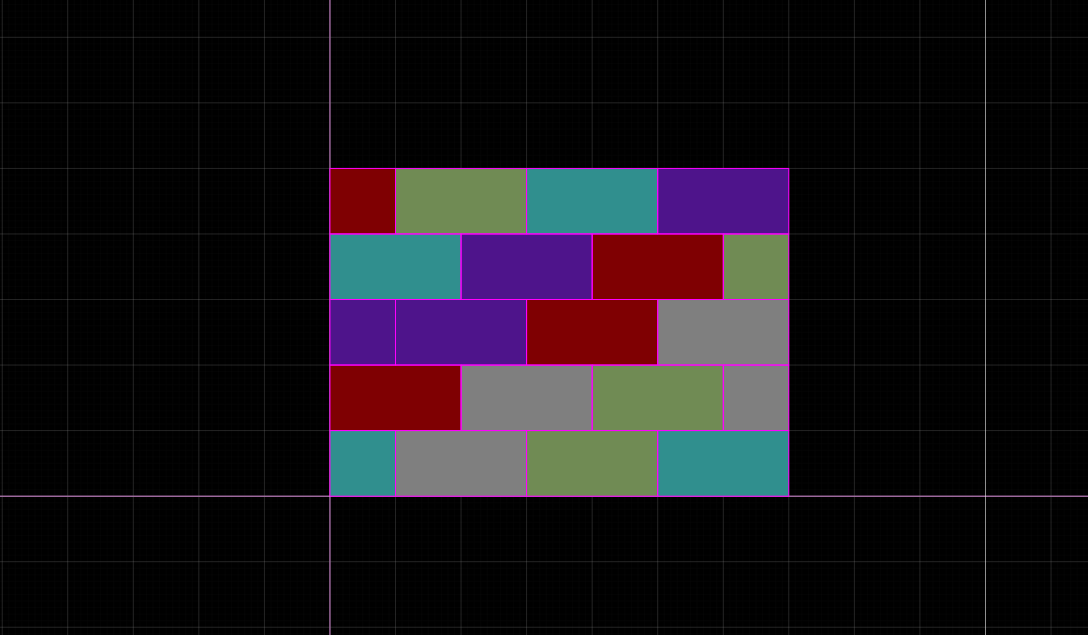
The display should be :
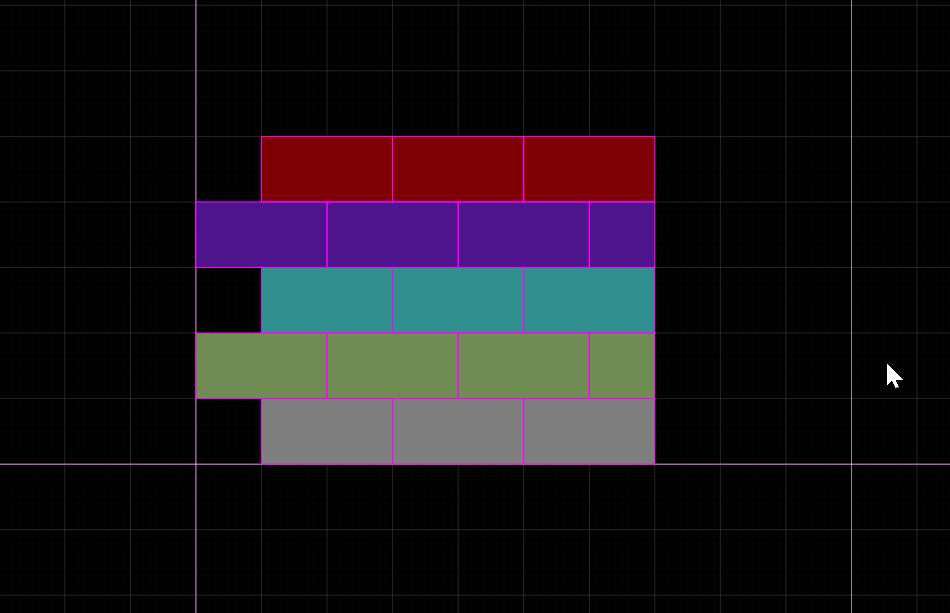
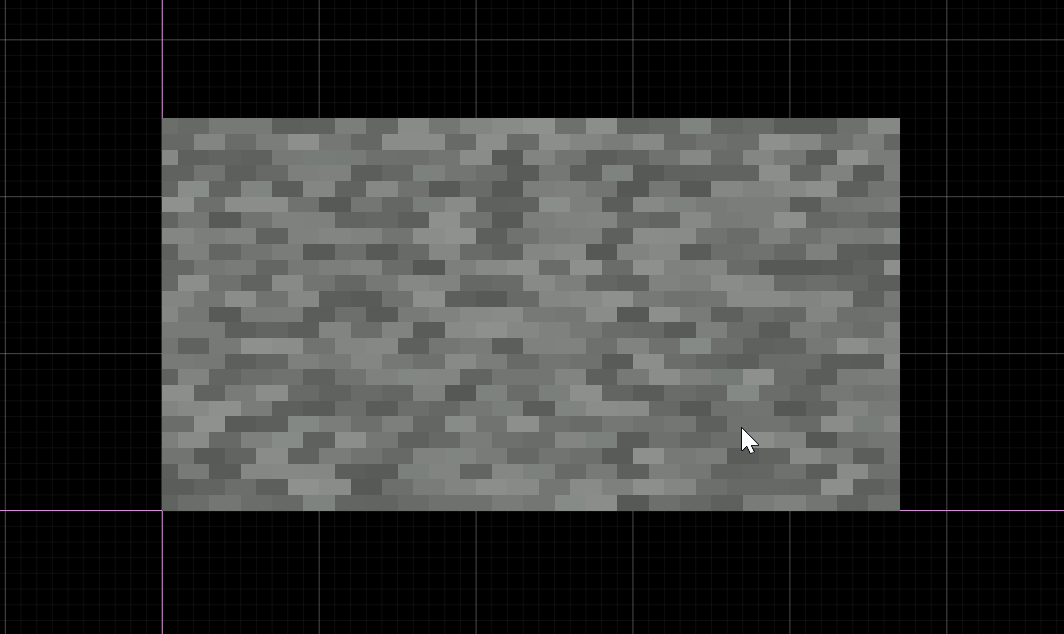
It starts to look like a brick wall, except the color are by rows instead of being by brick.
We should be using our color gradient node after all the splitting and add a bit of randomness. To do so, we will move the colorize node and apply it to the output of the latest split node.
From this :
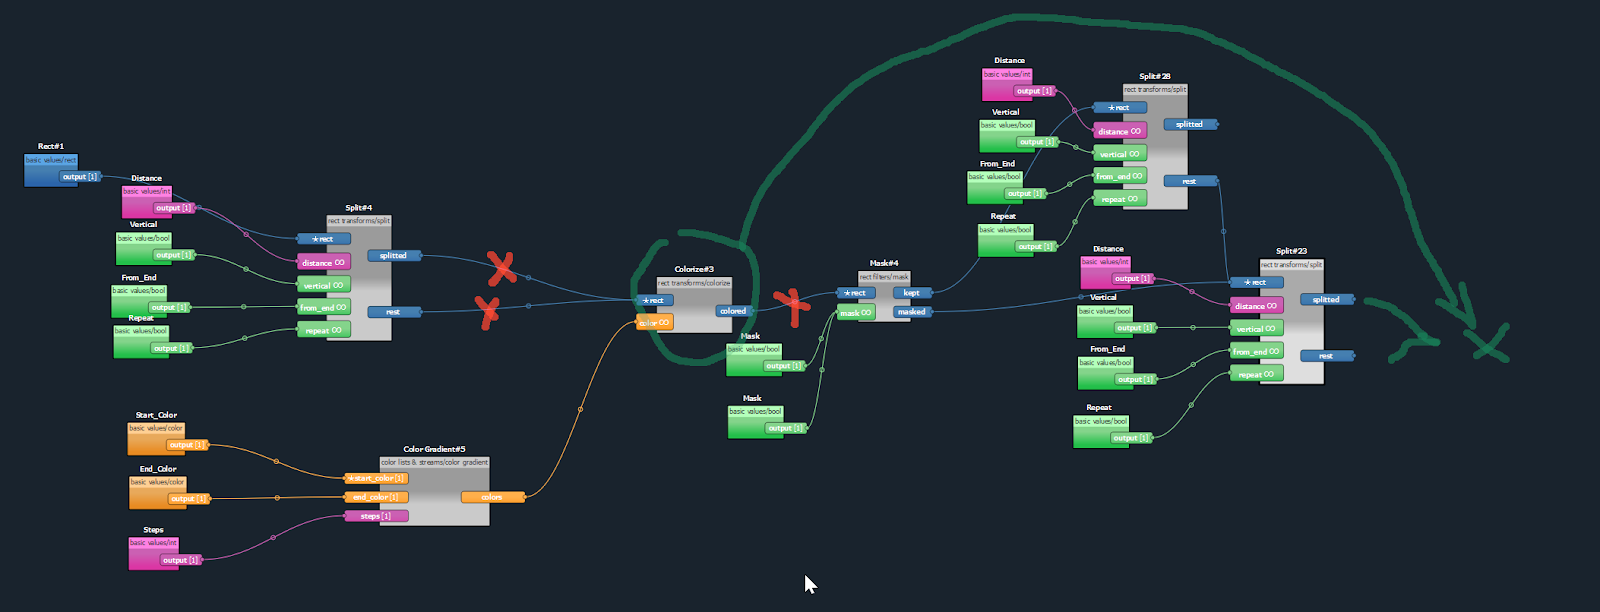
To cut a connection,just click on the circle on its middle point.
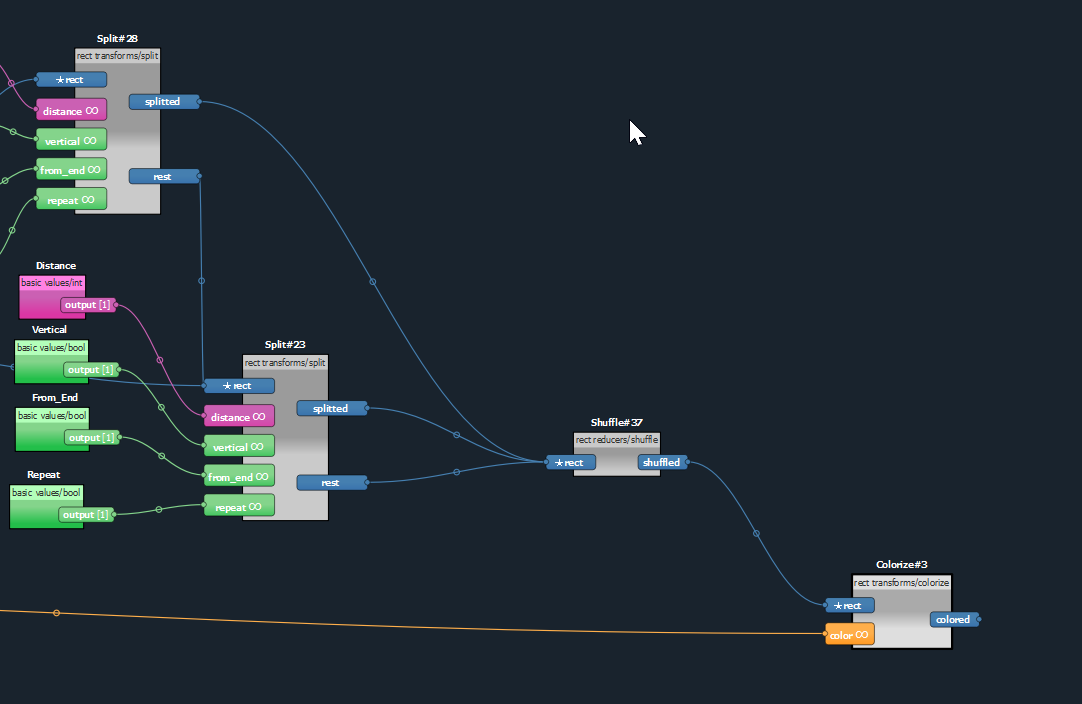
The end result should be this :
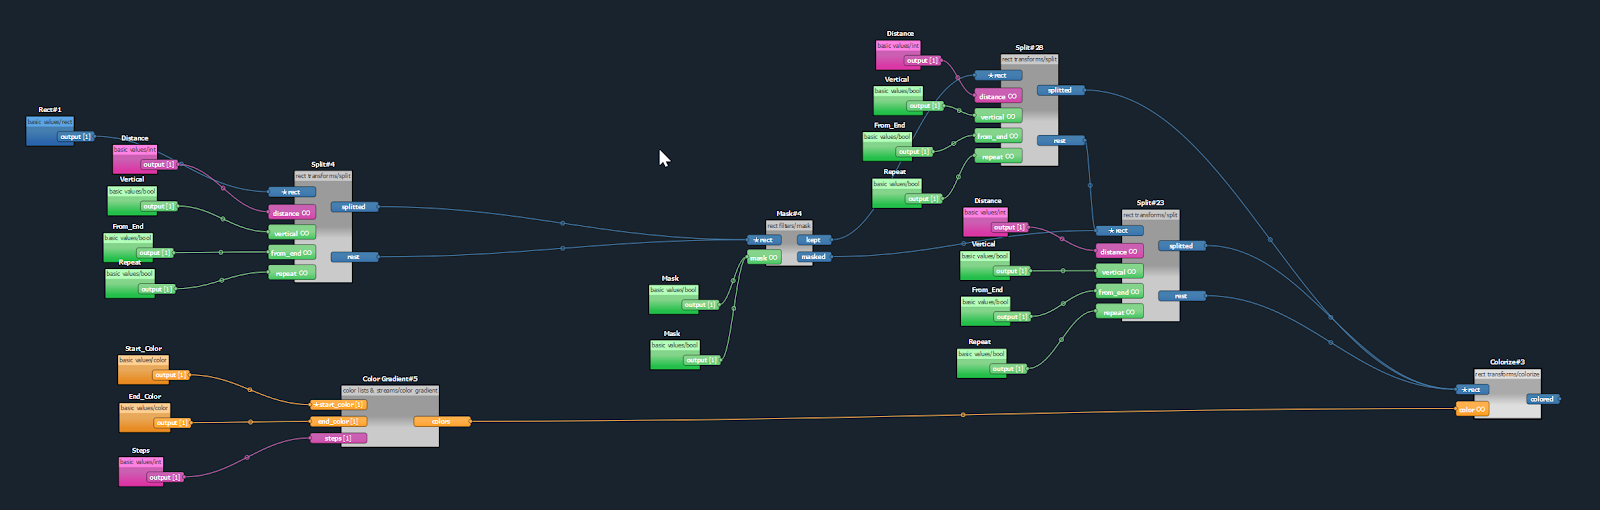
And the visual ( with colorize node selected ) :
We are getting there, but the colors are still following some kind of progression. ( Depending on your color choice it might be more or less visible ).
So we need to shuffle the rectangle we get to break the sequence. So we will use a ... shuffle node just before colorizing the rects.
The other change is to replace the static value for the color gradient steps by the number of the rectangle to be colored. To do so, we will use a count node that will ..yeah...count the rects.
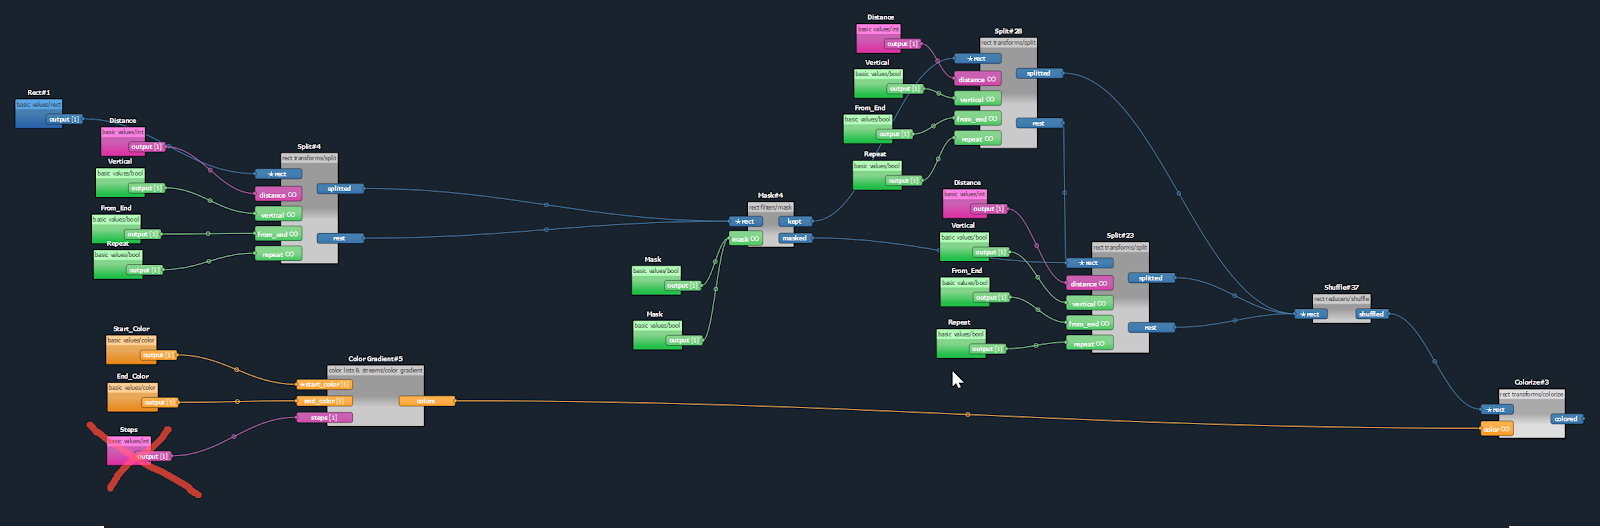
I have moved the nodes around for better readability, but you should have something like :

With a better selection of colors ( I used #8e918e for start and #303130 for end ), both border rendering options unticked, you should have something like :
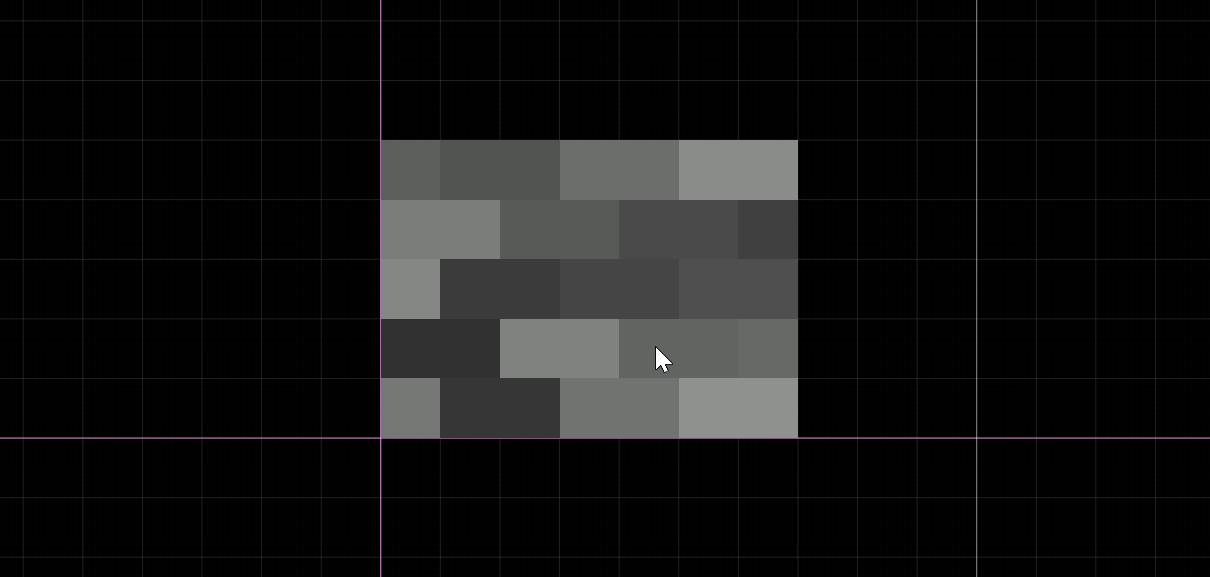
The fun part is obviously to change the size of the initial rect to see everything adapt :
We are done for this part, we have our simple yet flexible brick wall. During this part, you should have learned the following skills :
- Connecting multiple value node to same slots to create streams.
- Disconnecting nodes and moving them in the graph
- Shuffling, Counting and better Spitting.
Part 3 : Using the node library.
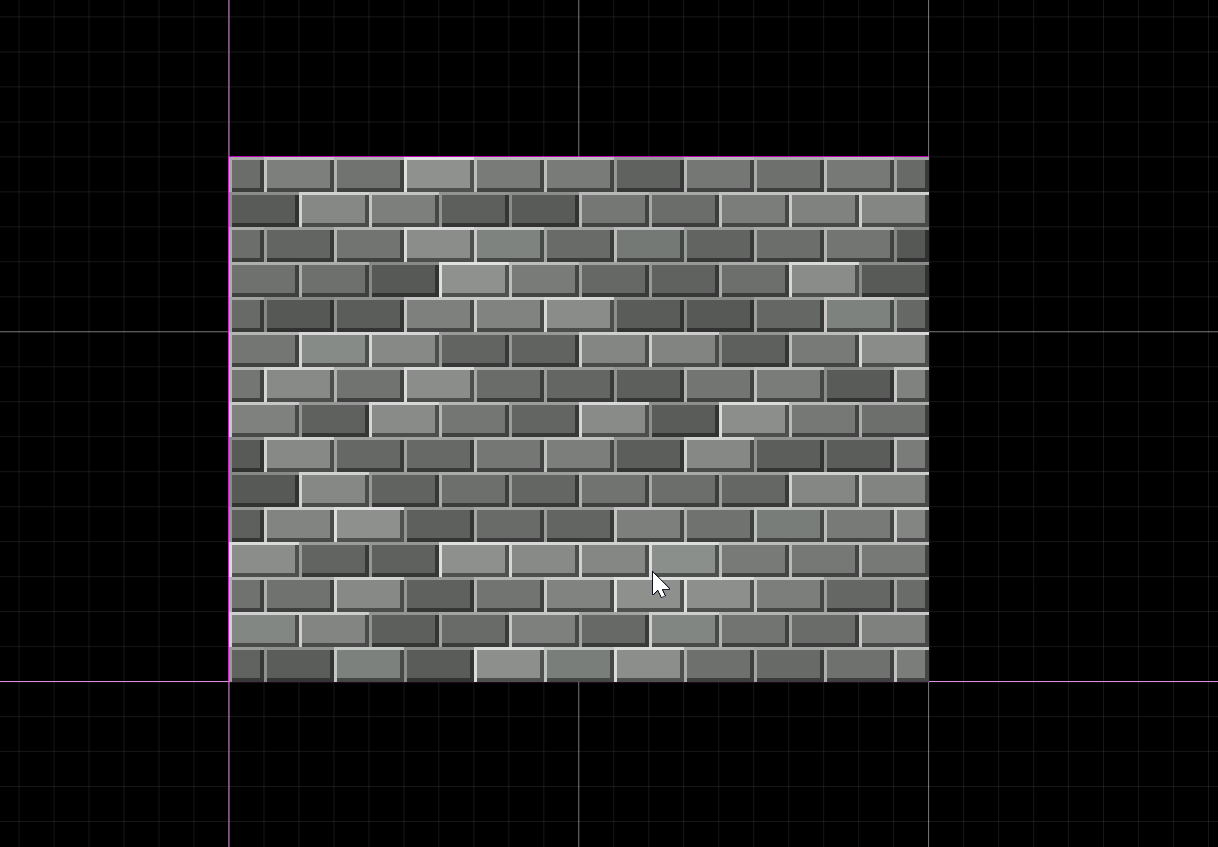
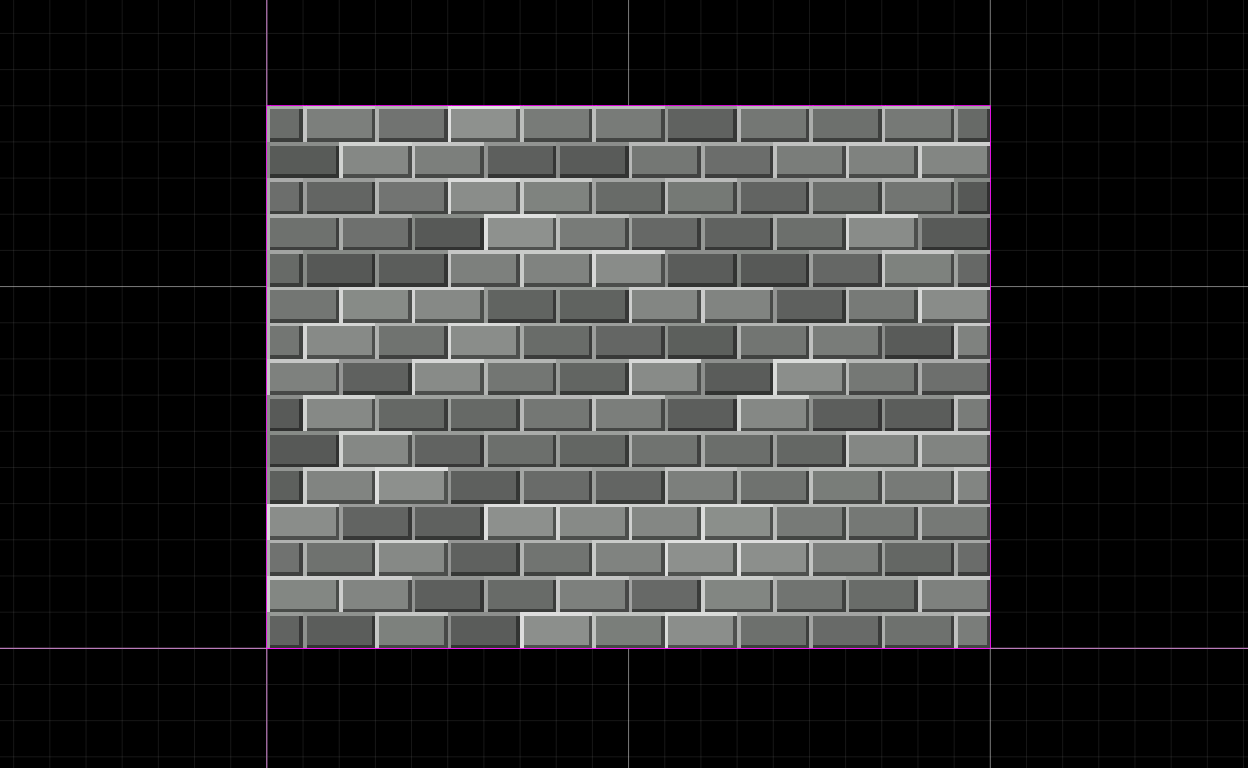
The goal in this last part, the grandiose finale, is to get - with only a few changes - something similar to this :
We will use a new node called “stone” that makes the dark and light border for each rectangle. This node is not part of the basic nodes but is in the library, a list of nodes that were built with rectitude and included in any project.
Because, the stone node create a border, we need first to enlarge both the initial rectangle and the size of our brick : if our bricks are 2 per 1 pixels, there is no way to make a border.
So first, we will need to change some dimensions in the graph :

Our wall should be mostly the same except bigger.
Now, we will import a node from the standard library. Click on then go to the stblib folder and select the stone file ( yeah the one with the spelling mistake, my bad ) . Once done, you should find it in the Catalog on the left, at the bottom under the name of your project and the branch “stdlib”.

Once imported, this node can used like any other. So, drag-drop, connect to the output slot of the colorize node to get the final result :
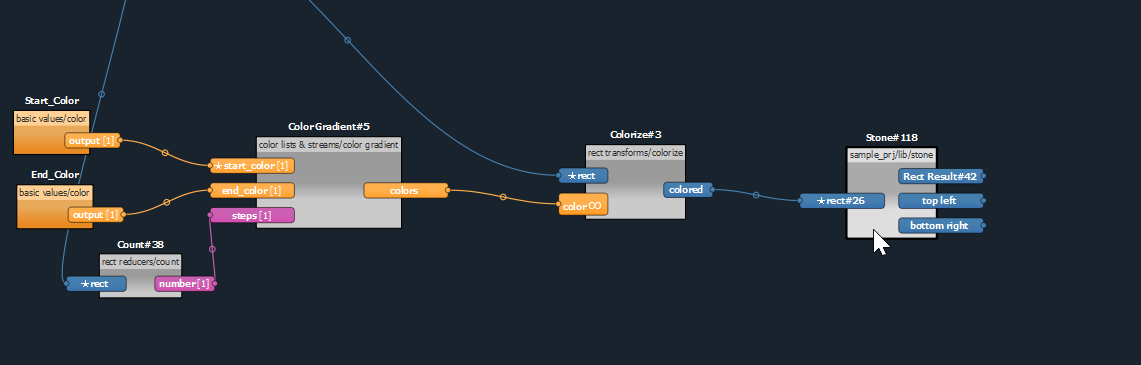
At soon as you connect it, because the stone node does a lot of splitting and coloring, the throbber will start to turn :
But soon, the final wall should be there :
We are done for this part, we have our not so-simple yet flexible brick wall. During this part, you should have learned the following skills :
- Import nodes from the standard library
- Resizing key values in a graph.
- Waiting for the throbber ;).
Part 4 : final words
This is the first tutorial for rectitude, I tried to make it as fast as possible to giving a glimpse of what can be done with it. I hope you liked it but do tell me if anything is unclear.
One important thing to remember is that the stone node in the final part has been created with rectitude itself. It is a graph, it has the same nature as the one we just built, it is just enhanced a bit to be used as a node.
The next tutorial will focus on that, Helping the user building its own library of nodes.
Comments
Log in with itch.io to leave a comment.
This is really cool, and also a great tutorial. Thanks for posting.